Jewelry product video ideas are repeatable ways to show scale, sparkle, movement, and styling with a phone, making them useful for independent jewelers, marketplace sellers, and small accessories brands.
The strongest jewelry videos combine one clear selling angle with controlled light and a simple movement. Start with a clean hero shot, add a close detail or on-body scale reference, then finish with a steady packshot. A short sequence like this can make even a one-table setup feel considered and easy to understand.
This guide gives you seven concepts, a phone-friendly shooting method, and a copyable shot plan you can use for rings, earrings, necklaces, bracelets, or watches.
Why do jewelry product video ideas work?
Jewelry is small, reflective, and difficult to judge from a single image. Video can answer three practical buyer questions quickly: How large is it? How does it catch light? How does it sit when worn?
Each concept below focuses on one of those questions. Do not try to communicate material, gifting, craftsmanship, styling, and every available color in the same clip. A narrow story is easier to shoot and easier to recognize while scrolling.
Before recording, decide whether your main angle is detail, scale, motion, styling, or occasion. That decision should determine the first shot rather than being added during editing.
7 jewelry product video ideas to try
1. The slow sparkle turn
Place the piece on a matte neutral surface and rotate it slowly as a soft light moves across the metal or stones. Keep the camera fixed. This makes the reflections feel intentional instead of shaky.
Use this for faceted stones, polished metal, and textured finishes. Record several rotations at different speeds, because a movement that feels slow in real life may still look hurried on screen.
2. The on-hand scale reveal
Begin with a close frame that hides the wearer, then pull back just enough to show the ring, bracelet, or watch in proportion to a hand or wrist. The reveal provides scale without requiring measurements on screen.
Keep nails, sleeves, and background understated. They should support the piece rather than compete with its color or shape.
3. The clasp-to-finish story
Show a necklace or bracelet being opened, fastened, and settled into place. This tiny action communicates handling and construction while giving the clip a natural beginning, middle, and end.
If hands are in frame, rehearse the move before recording. Slow, deliberate fingers look calmer and reduce the number of unusable takes.
4. The outfit pairing switch
Film the same piece with two or three simple looks: a white shirt, a dark knit, and a bare neckline, for example. Match the framing so each cut feels like a styling transformation rather than a new scene.
This concept works when versatility is the story. Keep exposure and white balance consistent so the metal color does not change between outfits.
5. The material detail macro
Move close enough to reveal engraving, a stone setting, hammered texture, links, or an edge profile. Start with the detail, then cut to the complete piece so viewers understand what they saw.
Many phone cameras struggle when placed too close. Step back until focus locks reliably, record at the highest useful resolution, and crop modestly later rather than accepting a soft image.
6. The gift-ready sequence
Build a three-shot story: closed box, box opening, and jewelry reveal. Add tissue, ribbon, or a blank card only when those items are genuinely part of the customer experience.
The emotional angle is anticipation, so pause briefly before the final reveal. Avoid cluttered wrapping and printed props that pull attention away from the piece.
7. The day-to-night light change
Hold the composition steady while switching from soft window light to a darker, directional setup. The first look can suggest everyday wear; the second can suggest an evening occasion.
Lock the camera position and product position between takes. The transformation reads more clearly when only the light and styling change.
How do you shoot jewelry videos on a phone?
Use a stable phone, a large diffused light source, and a background that does not reflect unwanted colors. Jewelry magnifies small production problems, so clean the piece, the surface, and the phone lens before every setup.
- Stabilize the frame. Use a tripod, clamp, or a stack of solid objects. Mark the product position with removable tape outside the crop.
- Soften the light. Shoot beside a bright window with a sheer curtain, or bounce a lamp from a white wall. Avoid mixing daylight with warm room lights.
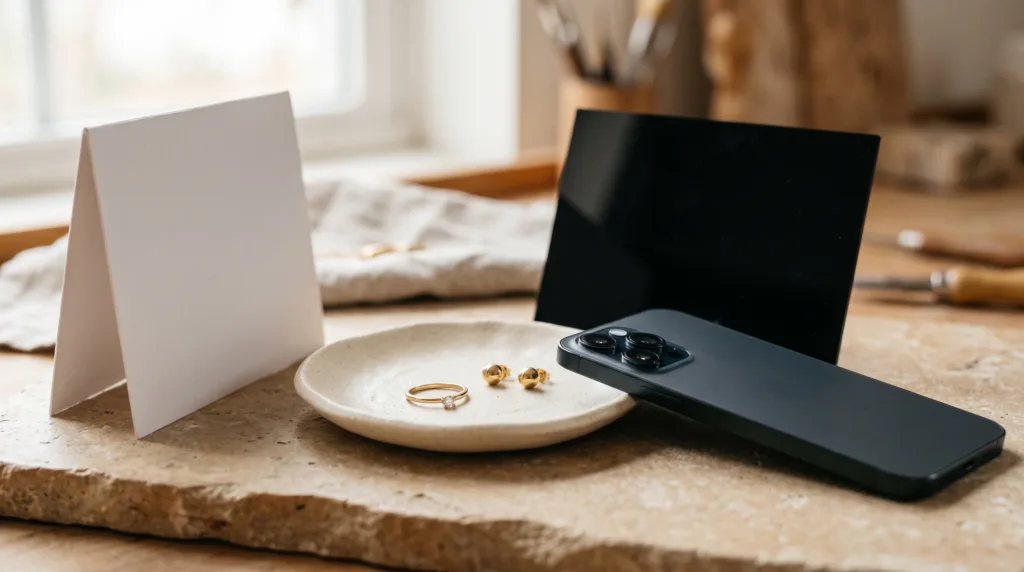
- Control reflections. Move white and black cards around the product to shape bright and dark areas in polished metal. Keep the cards outside the frame.
- Lock focus and exposure. Tap and hold on the jewelry, then lower exposure slightly if highlights are clipping.
- Record handles. Hold each shot still for a second before and after the action. These quiet frames make editing easier.
Use the 12-clip product video shot list when you need more coverage, then choose only the clips that support this jewelry story.
According to TikTok Business (2026), the recommended vertical dimensions for non-Spark in-feed ads are 9:16 at a minimum of 540 × 960 pixels. The same specification allows files up to 500 MB and durations up to 10 minutes, though a focused jewelry ad will usually be much shorter.
If you plan to reuse a master across placements, check this product video aspect ratio guide before you frame tight close-ups near the edges.
How do you turn one concept into a short jewelry ad?
Choose one concept and arrange it as a five-beat sequence. The structure matters more than adding many transitions.
- Hook: Open with the strongest reflection, movement, or on-body reveal.
- Context: Show the complete piece so the viewer can orient themselves.
- Proof: Add a detail, clasp action, or scale reference.
- Variation: Change the angle, styling, or light while keeping the product recognizable.
- Finish: Hold a clean packshot long enough for the shape to register.
If your only starting asset is a still image, you can turn a jewelry product photo into a short ad in Prodvid; it is our iOS app for AI product video ads. Check generated details carefully, especially prongs, chains, clasps, logos, and stone shapes, before publishing.
Copyable jewelry video shot checklist
- One clean vertical hero shot
- One close detail with sharp focus
- One hand, wrist, ear, or neckline scale reference
- One controlled movement: turn, clasp, lift, or light sweep
- One alternate angle or styling variation
- One steady final packshot
- Metal color consistent across every clip
- No dust, fingerprints, clipped highlights, or distracting reflections
FAQ
What is the best background for a jewelry video?
A matte, neutral background is the safest starting point because it reduces glare and color contamination. Warm stone, pale paper, dark fabric, or unfinished wood can work when their texture supports the product. Test the background beside the jewelry before filming; white metal can disappear on pale surfaces, while gold may pick up nearby colors.
How do you make jewelry sparkle on video?
Move a broad light slowly across a stationary piece, or rotate the piece while keeping the camera and light fixed. A small point light can create sharp flashes, but it may also produce clipped highlights. Make tiny changes, watch the reflection path, and stop before the sparkle hides the stone or metal details.
Should jewelry videos show a model?
Show a model or body detail when scale, fit, drape, or styling affects the buying decision. A hand, wrist, ear, or neckline can be enough; a full portrait is not always necessary. Pair the on-body view with a clean product close-up so viewers see both proportion and construction.
How long should a jewelry product video be?
A useful jewelry video is as long as needed to communicate one angle without repeating itself. For a short social ad, start by editing the five-beat sequence tightly, then remove any clip that does not add detail, scale, movement, or context. Keep a longer master so you can make shorter platform-specific versions later.
Key takeaways
- Build each video around one angle: detail, scale, movement, styling, or occasion.
- Use soft light, a stable phone, and controlled reflections before adding effects.
- Combine a hero shot, proof detail, scale reference, variation, and clean finish.
- Review fine jewelry details frame by frame, especially after AI-assisted generation.
- Record extra handles and a flexible master crop to simplify later edits.
Sources
- TikTok Business: TikTok Auction In-Feed Ads, updated June 2026.